Showing posts with label tips and tricks. Show all posts

10.30.2012

Wireless Charging for Samsung Galaxy Note 2 : Full Tutorial

Many of the upcoming smartphones from Nokia is expected to have the wireless charging feature. Nokia has already announced it among the features of Lumia 920, that will be launched in November 2012. Samsung lovers will be looking forward to have the technology in their hands. Here is the technique for making wireless charging possible in Samsung Galaxy Note 2, the latest pin up.
The method is suggested by Ryan_G, and in the tutorial he says the method is cheap and costs only £10 (around $16). Developer claims to have the technique working. 

You will need
  • Palm Touchstone
  • Palm Pre Touchstone case
  • Heat Shrink
  • Electrical Tape
  • Speaker Wire or any other thin multi-core wire
  1. Take the induction coil out of the Palm Pre case
  2. Place the coil in the center of the Note battery case and then place the silver sticker over the coil as it was on the Palm Pre
  3. Check where the charging pins on the note meets with the case and mark it with a pen to indicate where the wires would have to be.
  4. Cut two speaker cables to length and strip the insulation off leaving the wire itself and then place heat shrink over them and heat them up
  5. Solder the wires to the charging circuit positive and negative and line it up in the case with electrical tape.
  6. Place the cover over the Palm Touchstone dock and check the voltage from the wires with a meter to check everything is working and the polarity is correct.
  7. Place it back on the phone and you'll wireless charging.
Source

Orginal Thread : http://forum.xda-developers.com/showthread.php?t=1951493
Developer : Ryan_G

3.04.2012

How to increase Battery life of your android handset?

      The battery life of android phones and tablets are experienced to be too low compared to devices running  on other operating systems such as Symbian and windows. The reason behind this difference is not only hardware but the way the OS runs in your device. There are certain tips to increase the battery life up to a good extent.


1. Exit Unwanted apps

          If you hide applications it will be running in back ground and so taking a portion of the processor and hence the battery life. So when ever a running application is not wanted exit it or 'back' from it.

2. Use an application killer

          You can use an application killer to completely exit the applications and hence saving a lot of battery life and reduce the wastage of RAM.

3. Turn of frequent mail alerts

          Applications providing frequent mail alerts will access internet connectivity to get its information updated. This will use a lot of battery. So avoid using these applications if its not a must.

4. Turn off Wi Fi

          If Wi Fi is turned on it will frequently search for available Wi Fi spots and this will consume the charge. So turn off Wi Fi whenever its not needed.

5. Use 2G mode

          If internet access is not needed put the network mode in 2G. Using 3G or Dual mode will kill the battery charge.

6. Turn off weather updates

         Try to avoid using applications such as weather updates. Use it to a minimum if its a must.

7. Display Brightness

        Use display brightness according to the need. Use minimum brightness and get more power back up.

2.12.2012

Download Odin 1.85 software for updating Samsung galaxy S2

Updating or rooting Samsung mobile especially Galaxy S2 is not easier using the official Kies software. The steps that should be followed are not simple enough to be used by common users.

The only solution for this problem is to use the Odin software. Odin is an one click rooting software. There is nothing much we wanted to do to root your device using Odin software. The steps that should be followed is explained in our older posts about rooting like,

http://www.crackerspot.info/2011/10/install-android-237-cyanogenmod-71-on.html

http://www.crackerspot.info/2012/02/install-i9100xxlpb-403-ice-cream.html


You can find the method of operating this software in these older posts.

The latest version of Odin available is Odin 1.85. Here is the links to download the software.

Link 1 : http://www.ziddu.com/download/18590353/Odin3-v1-1.85.zip.html

Link 2 : http://hotfile.com/dl/117599769/da45e23/Odin3-v1.85.zip

We will share the updates of this software or the upcoming versions with you in future.

12.23.2011

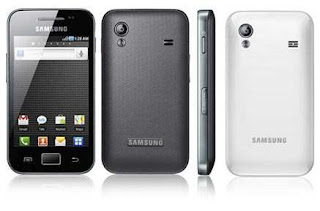
Install Android 2.3.5 Gingerbread on Samsung Galaxy ACE S5830 with S5830XXKPO Official Firmware


Tutorial to install Android 2.3.5 Gingerbread update on Samsung Galaxy Ace S5830 is explained below.


Downloads

Must do
  • Make sure that the phone is well charged 
  • Back up your phone data

Steps

  • Unzip the main firmware file
  • Shut down Samsung Kies
  • Run Odin 4.38
  • Switch off the phone
  • Hold Volume down key + Home button key and press power on to goto download mode
  • Connect to USB
  • You will get the message “Added! !” 
  • Put the files like this in Odin:
  • OPS = Cooper_v1.0.ops,
  • Check the one package on the left side of ODIN
  • Select S5830XXKPO_S5830XXKPO_S5830SERKPO_HOME.tar.md5 in One package
  • Hit the start button
  • When your phone gets restarted, disconnect the cable


Be careful while installing


for full article visit DialAndroid.com

12.03.2011

Airtel 3G Latest Proxy


The older versions of Airtel proxy seems to get deactivated after about a months usage. This trick will help you use it longer.


Here is the trick to get Airtel 3G in 2G tariff...

1. Port to Airtel from your existing prepaid service, by sending the message PORT <your Mobile Number> to 1900

2. It will take around a week to get it done.

3. After getting your Airtel activated, activate GPRS, 121 will help you for that.

4. Then you will get GPRS activated and you will recieve the settings

5. Go to 'Connectivity>Network>Network Mode' and select 2G mode (GSM)

6. Recharge for Rs.98, its the 2G offer with 1 Gb for 1 month (offers may vary with area, confirm it from www.airtel.in)


7. Then activate 3G by sending 3G to 121


8. Then you will recive an alert that 'your existing 2G offers will be deactivated reply 1 to confirm'. 


9. You can reply with 1 and its not going to get deactivated

10. It will be activated soon, may be in an hour.

11. Then Go to 'Connectivity>Network>Network Mode' and select 3G mode (UMTS)

12. Start browsing and experince the lightening speed of Airtel 3G !!!!

13. Don't forget to renew your 2G pack a day before the last day.

14. If you are experience lesser speed after 1 month do the following

15. Recharge for Rs 8 (Basic 3G plan) the do The 2G offer.

16. You will get the speed back if you are lucky!!!


This Airtel 3G proxy is tested and is working properly.


To know about BSNL 3G proxy Click here


12.02.2011

BSNL 3G Latest Trick 2011


3G schemes available for BSNL customers are Rs 20 (50Mb), Rs 50 (100Mb), Rs 100 (250Mb)  and so on. But you can access BSNL 3G in the cost of 2G now.


Here is the trick to get BSNL 3G in 2G tariff...

1. Get a BSNL prepaid connection.

2. Activate GPRS by sending 'GPRSPRE' to 53733

4. Then you will get GPRS activated and you will recieve the settings

5. Then activate 3G service on your phone

6. Go to 'Connectivity>Network>Network Mode' and select 2G mode (GSM)

7. Recharge for Rs.89, its the 2G offer with 3 Gb for 1 month

8. Then Go to 'Connectivity>Network>Network Mode' and select 3G mode (UMTS)

9. Start using Bsnl 3G in the cost of 2G !!!!

This BSNL 3G proxy is tested and is working properly.

Airtel 3G Trick Click Here

11.07.2011

Flashing Nokia Device


Flashing means re-installing phones firmware (Operating system) files. There are many situations when it becomes necessary to flash a mobile (Deletion/corruption of system files, phone is dead etc). Besides, flashing is also useful to update to latest (Or any available) firmware, to install a custom (cooked) firmware or to install an older firmware over an updated new firmware. So here goes the process, carefully follow the instructions given below as such:


First up, note down your phones firmware version/release (Find by pressing *#0000# at standby, in the form of x.xxx.xx), product code (On the sticker under battery in the form of 0XXXXXX) and type (Look at the sticker under the battery in the form of RM-xxx).

1. Download and install Phoenix Service Software (2009 or 2010) in your (Windows) PC/Laptop from www.4shared.com or elsewhere (search Google)
2. Download and install latest version of Navifirm from here
3. Run Navifirm and wait until it loads the Products (Phone model names/codes) list (Requires fast internet connection)
4. Find your phone model and code in the list and select it (For example, select RM-596 for Nokia N8)
5. Wait for a while until it loads “Releases”. Select the desired release (22.14 in case of N8)
6. Wait until Navifirm loads “Variants” (Product code of the phone – you can find yours at the sticker usually below battery). Select the desired variant and wait until Navifirm shows firmware files in the last pane.
7. Check all the boxes (in the last pane) and click “Download with program” button below the last pane. Choose the folder where you want to download the “Official” firmware files. After download is complete, copy the files.
8. Go to “C:/Program Files/Nokia/Phoenix/Products” and create a new folder in the last folder (“Products”) of the above path and name it RM-xxx (which is your phone type code that you noted earlier, replace “xxx” with your phones actual code numbers, for example it will be RM-596 for N8). Now paste the downloaded files (copied in the Step 7 above) to the newly created folder “C:/Program Files/Nokia/Phoenix/Products/RM-596″. Phoenix will look for the files in the above folder when flashing the phone (Nokia N8 in this case)
9. Launch “Phoenix” in PC and connect your mobile (Nokia N8 in this case) via Data/USB cable (Select PC Suite mode). In Phoenix, Go to “File/Scan Product”, Phoenix will detect the phone. Now select “Flashing/Firmware Update”
10. At the firmware update window, Phoenix will automatically look up and find the official firmware files earlier downloaded via Navifirm. However if it doesn’t find the files
a. Check that the directory “C:/Program Files/Nokia/Phoenix/Products/RM-596” exists, (create if it does not and place the firmware files into it – Step 8 above)
b. Check that the above path is present in all the three boxes in Tools/Options/Product Location (In Phoenix), set it if it does not and repeat steps 9 onwards.
If everything upto step 10 goes successful, select “Refurbish”, ignore all the warning boxes that appear during the process. Wait until the “Successful” dialog box appear (DO NOT touch or disconnect the phone or USB cable during the process). Press OK, phone will disconnect and restart. Thank God that everything went well….hopefully….best of luck
For any problem please leave a comment
You may also try flashing with J.A.F. software, described step-by-step in this post
Note – If Phoenix gives error while running in Windows Vista or 7 then try running Phoenix in compatibility mode (Right click on its icon – Properties – Compatibility – Tick/Check “Run this program in compatibility mode for Windows XP (Service Pack 3 or 2) – Click “Apply” and then OK).
WARNING: Phone flashing is a double-edged sword; it may be useful and dangerous at the same time. It may brick/damage your phone for good (If not done carefully), so please DO NOT flash your device if you don’t know what the hell “Flashing a phone” is.
Also note that Phoenix is available for Windows only (not available for Linux or Mac)

11.04.2011

Visidon AppLock: Face detection lock/Unlock feature for Android phones


Face detection was main attraction of Android 4.0 when it was launched. Well it will take time to get official Android 4.0 on Galaxy devices. But the feature is available to even Android 2.3 devices with front camera. All that needs is the application Visidon AppLock.


Visidon AppLock App is very functional and useful security application. This application come in two versions. First one is free version which has limited functionality and the other one is Visidon AppLock plus which give you complete control and access to all the features.

Visidon AppLock Free version (Market Link)
  • App lets you choose the apps to be protected.
  • Your face is a key to open them! Application uses the frontal camera of your mobile
  • You can choose to have a alphanumeric password to bypass the face lock
Visidon Applock Plus version (Market Link)
  • No ads!
  • Pattern and PIN as alternative unlocking methods!
  • Haptic feedback for all alternative unlocking methods!
  • Experimental lock screen feature
  • Liveness detector, which guards against photograph spoofing!

Download


Screen Shots


About Visidon AppLock

Fast, convenient and cool way to protect your mobile with face recognition. Protect any application (i.e. SMS, Gallery, E-Mail, Facebook, etc.) on your phone using face recognition. Convenient and cool way to increase safety of your private apps and content.
Visidon AppLock Plus lets you choose the apps to be protected. Your face is a key to open them! Application uses the frontal camera of your mobile and verifies in real-time that the face matches the one allowed to access the private apps.
By upgrading to Plus version you'll get:
- No ads!
- Pattern and PIN as alternative unlocking methods!
- Haptic feedback for all alternative unlocking methods!
- Experimental lockscreen feature (read important note below!)
- Liveness detector, which guards against photograph spoofing!
- More extra features in future versions!

About lockscreen:
This is an experimental beta feature. You should also use the default AppLock feature (check the most important apps from the applist) to counter possible security holes. You can set the Keep unlock status option, so you do not need to verify yourself again when you are accessing a particular app if you have done the verification in the lockscreen. Note that this option will enable lockscreen features (disabled Home button etc.) also in default AppLock behavior. Also, this feature does not include an option to make an emergency call, so use it at your own risk.

    10.24.2011

    Blogger: How to Add Adsense Below Post Titles

    Google Adsense is the most popular ad network on the planet. A lot of Blogger users also use it. It's an endless discussion where to place these ads on your blog for maximum exposure. The best ad places are around the header or above the posts or below the post titles. You can easily add adsense in your sidebar as a gadget. But Blogger doesn't allows us to directly place the ads below post titles. The ads below post titles have proven to be one of the most successful money making possitions. So, what are you waiting for? Follow this tutorial to add your Adsense ads below post titles.
    Please Note: I'm assuming that you're using the new Adsense interface.

    Steps!

    1. Log in to your Google Adsense account by going to https://www.google.com/adsense/
    2. Go to My ads tab and open Ad units from the left side by expanding Content link.[View Screenshot for Help]
    3. Click new ad unit to create a new ad.[View Screenshot for Help]
    4. Select the size, type and color of your ad. For best results chose either 300x250 medium or 336x250 large rectangle.[View Screenshot for Help]
    5. Give your ad a remember-able name and ad a custom channel to track the ad performance. If you don't know anything about channels then leave that option.
    6. After filling required information, click save and get code button at the bottom of the page.[View Screenshot for Help]
    7. A pop-up window will appear with the ad code. Copy that code.[View Screenshot for Help]
    8. Before pasting the ad code in Blogger, we must make it compatible with Blogger format. So go tohttp://www.hacktrix.com/adsense-code-converter/ paste the ad code and convert it. You'll find the converted ad code in the bottom box there. Copy the converted ad code.
    9. Open your Blogger account and go to Design then Edit HTML tab and check Expand Widget Templates option.
    10. Press Ctrl + f & find <data:post.body/> you'll see some code like this:
    11.     <div class='post-body entry-content'>
      <data:post.body/>
      <div style='clear: both;'/> <!-- clear for photos floats -->
      </div>
    12. Paste the converted ad code just before the above code. The result would look something like this:
    13. <script type="text/javascript"><!--
      google_ad_client = "ca-pub-xxxxxxxxxxxxxxx";
      /* my ads */
      google_ad_slot = "xxxxxxxxxx";
      google_ad_width = 300;
      google_ad_height = 250;
      //-->
      </script>
      <script type="text/javascript"
      src="http://pagead2.googlesyndication.com/pagead/show_ads.js">
      </script>
      <div class='post-body entry-content'>
      <data:post.body/>
      <div style='clear: both;'/> <!-- clear for photos floats -->
      </div>
    14. Click the PREVIEW button to see the result. Thought you might not see ads below post titles instantly because sometimes Adsense ads take some time to display.
    15. After that save your template by clicking the SAVE TEMPLATE button.

    Tip: Make Ads Appear Only on Post Pages


    Usually, users don't like to see too many ads on a single page. So, we can hide the ads under post titles on main page. These ads will appear only when users will click the post title and go to the post page. To do that follow the steps above but after step 8 you have the converted ad code. Ad some more code in that converted code so that it should look like this:

    <b:if cond='data:blog.pageType == &quot;item&quot;'><script type="text/javascript"><!--
    google_ad_client = "ca-pub-xxxxxxxxxxxxxxx";
    /* my ads */
    google_ad_slot = "xxxxxxxxxx";
    google_ad_width = 300;
    google_ad_height = 250;
    //-->
    </script>
    <script type="text/javascript"
    src="http://pagead2.googlesyndication.com/pagead/show_ads.js">
    </script></b:if>

    What I did here is that I've added an if condition to make the ads appear only on post pages. After that, follow the steps above to complete the tutorial.

    Related Posts Plugin for WordPress, Blogger...