Showing posts with label Symbian Anna. Show all posts

9.13.2011

Nokia Bubbles


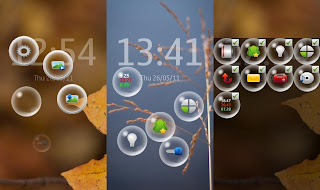
Nokia Bubbles is a new app from Nokia BetaLabs which lets you unlock your phone in a totally different way. When your phone is locked , you press the menu button and you see bubbles floating on the screen that let you do various things with it like responding to missed calls or viewing new messages . Watch the video below to get an idea how it works !
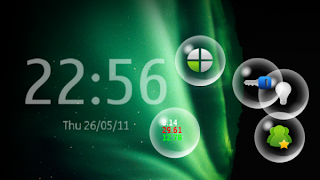
You can use the bubbles for the following actions
  • Unlock the phone
  • View new messages
  • View/Respond to missed calls
  • Control the music player
  • Control the FM radio
  • Change profile (profile timing also supported)
  • Call/Message your three best friends
  • Activate the backlight to use as a flashlight
  • Show your current location using Ovi Maps
  • Change the background of the Bubbles screen
  • Display when battery needs charging
  • Display statistics about bubble speed and distance (just for fun)


Download


                                    Download Now       


Compatibility
Nokia Bubbles has been verified on latest S^3 versions with phone models N8-00 and E7-00 and is known to work with Qt version 4.7.3. Incompatibilities with Ovi Store have been fixed.


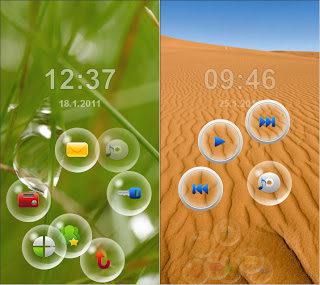
Screen Shots

Release notes

New in this release (26.05.2011):
  • Smart installer support with official Qt version.
  • Settings dialog to activate/deactivate bubbles.
  • Bubble view can be deactivated with menu/power key press to return screensaver immediately.
  • Reduced timeout to bring secondary drop points visible.

Getting started

Activate Nokia Bubbles:
1)    Lock device
2)    Press Menu or Power key
3)    Have fun with the Bubbles!

Installation instructions for all following devices:

Symbian^3

  • Nokia C6-01,
  •  
  • Nokia C7 Astound,
  •  
  • Nokia C7-00,
  •  
  • Nokia E6-00,
  •  
  • Nokia E7-00,
  •  
  • Nokia N8,
  •  
  • Nokia N8-00,
  •  
  • Nokia X7-00

Download instructions
Please read the following instructions carefully before proceeding with installation:
  1. If you don’t have older version of Nokia Bubbles installed you can jump to step 6)
  2. Uninstall any previous Bubbles version using following steps:
  3. Go to Settings -> Application manager -> Installed apps
  4. Long-press on Bubblelock (or Nokia Bubbles) from the list and selectUninstall
  5. Reboot device
  6. Make sure you have active data connection or you are in reach of WLANcoverage during the installation process. Installation uses Symbian Smart Installer, which will download and install required components if needed. Additional download may be required based on your phone configuration.
  7. Install Nokia Bubbles

    download (.SIS with SmartInstaller, 816kB)
  8. Reboot device


9.06.2011

How to Get Symbian Belle update on the Nokia N8


The upcoming Nokia 600, 700, 701 devices are already shipping with the new Nokia's Symbian Belle update. however, existing users will have to wait a little while longer as it's expected to be out some time in the third quarter with no specific date mentioned just yet. The update, just to reiterate, will be made available for Symbian^3 devices like the Nokia N8, C7, E7, C6-01, X7 and E6. I am going to show you on how to get belle on your N8. Other devices will still have to wait till the update gets officially rolled out.

Requirements
  • A Nokia N8
  • Latest version of the Nokia OVI suite. You can download it from Nokia’s website for free.
  • Navifirm+ version 1.3 (Download) 
  • Phoenix Service Software version 2011.14.004.45945 or higher (Download) 
  • Symbian Belle Firmware files (Download) 

Things to keep in mind
As this is a leaked build of the Belle update, there are likely to be stability issues. Some of the known bugs include Java apps and games not installing, the phone locking up and the dialer vanishing and then showing up on reboot. Follow the guide carefully to avoid any kind of problems. If you find the steps to be confusing and you aren't sure of what you're doing, don't proceed. Any errors and can result in your phone getting bricked.

Step by step guide
Download and uncompress Navifirm+ 1.3. Open the downloaded folder and run Navifirm. Next, select ‘Production External’ ---> Select Nokia N8 (RM-596) ---> Choose v22.014 ---> Select your product code and download all the files to your desktop. Create a new folder called RM-596 and move all the downloaded files to this folder. Windows XP users, move this folder to C:Program filesNokiaPhoenixProducts.

Windows 7 users need to use the paths specified below
x86 - C/Program Files/Nokia/Phoenix/Products/RM-596
x64 - C/Program Files(x86)/Nokia/Phoenix/Products/RM-596

Navifirm+ v1.3
Extract the Symbian Belle RAR file using password orvvan + mohamad 79 to your desktop.

Note: Those who already have their device connected to the Nokia Ovi suite mode need not go through the steps given below. Instead, Exit Ovi suite (if it is running in the background of your PC) and directly connect your phone to the PC using the Micro-USB cable.

Install latest version of Nokia OVI suite. If you already have it installed on your PC just make sure it's updated to the latest version. After installing the software,get your N8 and follow the steps mentioned below. Do not connect the device to your PC just yet. Go to ‘Menu’ --->Click on ‘Settings’ icon--->Select ‘Connectivity’ option--->Click on ‘USB’ option---> And finally click on the ‘Nokia Ovi suite’ option.

You will see that the Nokia Ovi Suite mode is selected as ‘Default’. Once you are done with the above steps connect your phone to the PC using a micro USB data cable. The N8 USB driver should get installed on your PC automatically. Follow the on-screen instructions and let the procedure finish.Once that's been completed, open the Ovi Suite and let the phone connect. Look out for a message - ‘Nokia N8 Connected’ - at the bottom of the window. Disconnect your phone by removing the cable and exit the Ovi suite even from the background.
Nokia Ovi suite
Before installing Phoenix Service software, turn off any antivirus or security suites you might have installed. The crack bundled is falsely detected as a virus. After installing Phoenix on your PC, connect your phone to the PC again. Now in Phoenix; set connections to No Connection ----> click on Files--->Select Open Product. A new window will appear, select RM-596 and click OK then select flashing from the top bar and click on Firmware Update. A new window will open, click on the box with three little dots and select the product code of your device and click Ok.
Phoenix screen shot showing product code to be selected

Related Posts Plugin for WordPress, Blogger...