Showing posts with label htc. Show all posts

4.24.2013

Unlocking Bootloader of AT&T HTC One using HTCDev


Another great news for the developers. The AT&T HTC One bootloader ca now be unlocked. This unlock is legal as it comes from he HTC's Dev website itself. The XDA users have been reporting about gaining root acces in HTC One and on flashing a custom recovery onto the AT&T HTC One. Though its a good news for those developers who wants to play on HTC One, the HTC have already mentioned that the bootloader unlock won't work for long as AT&T won't allow bootloader unlock for its variant of HTC One. So that says this window of opportunity is to be short lived.

Screenshots of the rooting & flashing on the AT&T HTC One indicate that it shares the same steps as those followed for the International version. Further updates from those who tried indicates that the flashlight, ringtone trimmer, sound recorder, and calculator applications are removed which seems fine. As always, once you unlock the bootloader of your device, root, and flash a custom recovery on to it at your own risk.

5.13.2012

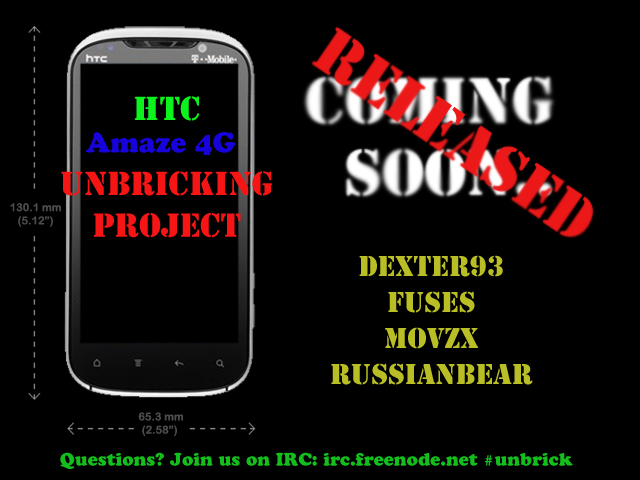
HTC Unbricking project delivers final release


A fully functional method to restore HTC device such as the HTC Amaze 4G, EVO 3D, MyTouch 4G Slide, Sensation, and the Vivid/Raider/Velocity from a full brick is finally released. This release boosts up the confidence of users while performing  potentially risky tasks such as HBoot updates, ROM flashes, or turning S On.
XDA Senior Member dexter93, along with a host of other developers, has finally released this project after several months of beta testing and waiting. This is great news for many HTC users who have bricked devices under certain circumstances, and is much better news for users who unintentionally—or even intentionally—brick theirs in the future.


The method is little bit complicated and requires some things at the user side.
Other Requirements
Linux-based computer
Most up to date RUU for your device
Finally, the most important of all, according to dexter93 is as folllows:
a device bricked by writing security flag 3 with an unsigned hboot, or caused by a damaged hboot via interrupted OTA update/RUU flash on a S-ON device
In other words, this will not work for all kinds of bricks. Rather it will only work for devices bricked by setting S On with an unsigned HBoot or if your HBoot was somehow damaged. While this unfortunately doesn’t help those who may have bricked their devices through other means, it will undoubtedly help many previously helpless users. It should be mentioned, though, that dexter93 and crew are looking to find way to fix other bricks as well.
For all the information such as download links, screen shots, the full instructions, and discussion, head over to the appropriate thread:


4.23.2012

HTC One S Root, Unlock, Recovery, and ROM Flashing Tutorilal


HTC One S, announced on February this year is the latest pinup to the HTC devices. The handset comes with Android ICS 4.0 OS. So far new ROMs are not available for the handset. But for future it is a must to unlock the device. The tutorial for unlocking the handset and Rooting is explained here step by step.


1. Steps to unlock the device


2. Steps for Recovery

  1.  Download the Interim CWM Touch Recovery of Paul : http://android.modaco.com/topic/353006-interim-clockworkmod-touch-recovery-for-the-htc-one-s-stock-download/
OR  2.  Official CWM of koush (HTC One S) : http://www.clockworkmod.com/rommanager

  • CWM file and  fastboot.exe should be  in the same folder
  • Open the cmd and go to the the folder above specified
  • Now type: fastboot flash recovery name_of_the_recovery.img 
    For Paul's: fastboot flash recovery r2-modaco-recovery-clockwork-touch-ville.img
    3. Steps for Rooting


    • Make sure you are on the stock kernel!
    • Now root your phone with SuperSU by Chainfire
    • Download SuperSU : http://forum.xda-developers.com/attachment.php?attachmentid=966165&d=1332770945
    • Flash it with the Recovery:
    • Swich off your the mobile and press VOLUME DOWN + Power to boot into the Bootloader
    • Navigate with VOL and Power to Recovery
    • Now flash the .zip:

      - install zip from sdcard
      - choose zip from sdcard
      - select the CWN-SuperSU-v0.87.zip file and flash it
      - Reboot the device

    The device is now ready to get flased by any custom ROM


    Source


    3.24.2012

    Dark Forces Team working on custom ROMs for HTC Titan and Radar


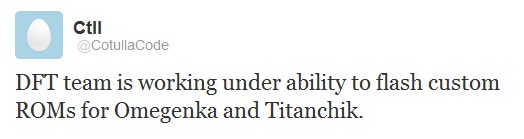
     As tweeted by Cotulla (@CotullaCode), the Dark Forces Team is working on bringing out custom ROMs to the HTC Radar and Titan. 


    Nothing else was revealed like an ETA or progress of such a project. DFT has made a lot of headway in making custom ROMs for Windows Phones in the past (and even for Samsung devices), so if there is any group who can do this, it will be them.

    Source: @CoutllaCode; via Windows Phone Hacker 

    10.03.2011

    Guide to HTC Wildfire


    This HTC Wildfire manual guides you through the set up process and highlights various ways to personalize the phone including ringtones and widgets.

    Setting Up the HTC Wildfire


    HTC Wildfire Front
    click & open image 
    HTC Wildfire Back
    click & open image
    The HTC Wildfire is an Android smartphone that has a lot of features. The first thing to do with the phone is to set it up. Install the SIM card and the microSD memory card. Follow these steps from the HTC Wildfire manual:
    • Remove the back cover.
    • Take out the battery.
    • Hold the SIM card so that the gold contacts are facing down and the cutout corner is facing out. Insert the SIM card into the SIM card slot, which is on the right side of the battery compartment.
    • Now insert the microSD card into the memory card slot, which is located on the left side (oriented with the back of phone facing you) of the phone. Make sure the gold contacts are facing down and that you push the card until it locks in place.
    • Place the battery back and place the cover over it.
    Now charge the battery with the power adapter, which connects to the USB port of the phone. After charging, turn on the phone by holding the Power button. One of the first things you will see is a prompt to enter a PIN for the SIM card. This is usually provided by the service provider. The next thing you see is the setup screen. Follow the on-screen prompts for each setting. It includes setting the language, how the phone connects to the Internet, and the type of e-mail accounts you want on the phone.


    Home Screen and Notifications


    HTC Wildfire Leap View
    click & open image
    After setting up the phone, the home screen is displayed. It features a status bar at the top and several widgets and icons, as well as a brilliant background. The default clock and weather widget displays the current time and weather conditions. The HTC Wildfire can accommodate a screen full of widgets and icons. If more room is needed, there are additional home screens. To access these home screens, press the home screen and swipe either to the left or the right. In the Leap View mode, you can see all seven home screens as thumbnail images. Pinch the screen to bring up Leap View. To return to the main home screen, press the Home button.
    The status bar shows a variety of indicators including the battery strength, the network (3G, EDGE), and Bluetooth connections to HTC Wildfire accessories. There are notification icons as well including the new tweet icon, new text message, and new voicemail. There are notification LED lights that turn on when certain phone features are in use. The HTC Wildfire manual states that:
    • A solid green light indicates that the battery is fully charged and the phone is connected to a computer or power adapter.
    • A flashing green light indicates a new notification.
    • A solid red light indicates that the battery is currently charging.
    • A flashing red light indicates that the battery is low.
    When multiple notifications are available, you can view them all in the notification panel. To access the notification panel, press the status bar and slide your finger downward.

    Making Calls and Answering Calls

    To make a phone call with the HTC Wildfire, press the Phone key. Dial the number on the on-screen keypad and press Call. If there are numbers stored in the contacts, they will pop up as you dial the number. Tap the number to place the call.
    When a call comes in, you can choose to answer it or ignore it. The call screen will display the caller ID of the person that is calling. To accept the call, press Answer. To ignore, press Decline.
    When the phone is locked, there are different ways to handle an incoming call. To answer a call when the phone is locked, press the caller ID bar and drag it down the screen. To reject a call when the phone is locked, press the caller ID bar and drag it upward. You can also press Menu and choose Decline.
    There are several options during a call. Follow these steps in the HTC Wildfire manual:
    • To mute the call or place it on speakerphone, press the respective on-screen buttons.
    • To place the call on hold, press Menu and select Hold. To resume the call, press Menu and select Unhold.
    • To answer a second call, press Answer. The first call is put on hold.
    • To switch between two calls, press the on-screen caller ID for the person you want to speak to.
    • Tap End to end the current call.
    The volume of the ringer and earpiece can be adjusted by following these steps in the HTC Wildfire manual:
    • Press the volume button on the side of the phone to increase or decrease the volume. To quickly place the phone in silent mode, press and hold the Power button and select Silent Mode.

    Ringtones, Scenes, Widgets, and Icons


    HTC Wildfire Widgets


    The exterior of the phone can be accessorized with HTC Wildfire cases, and the phone software can be accessorized with wallpaper, ringtones, and widgets. Scenes are a unique personalization tool that has preset wallpapers and widgets. You can add widgets individually to the home screen and select your own wallpaper.
    • To use a scene, press Menu on the home screen and select Scenes. Choose a preset scene and press Done.
    • To apply a specific wallpaper, press Menu on the home screen and select Wallpaper. Select which screen you would like to apply the wallpaper to. The options are Home or Lock Screen. You can choose from Android wallpapers, HTC wallpapers, or Gallery. The Gallery option is for photos. Select the wallpaper you want and press Set Wallpaper.
    • To add a widget to the home screen, press and hold an area of the home screen that is empty. This opens the Add To Home Menu. Select Widget and browse through the available widgets. Use the left and right arrows to view the different styles of calendar, music, photo albums, and Twitter widgets. Press Select to set the widget.
    • To add a shortcut or icon for an app on the home screen, press and hold an area of the home screen that is empty. Then tap App or Shortcut in the Add To Home menu. Then select the application or setting for which the icon or shortcut is for.
    Another way to personalize the HTC Wildfire is with ringtones. To change the ringtone, press Menu and tap Settings. Then select Personalize and choose Default Ringtone. Browse through the available ringtones. Select the one you want and press OK. To use a song as a ringtone, press the Personalize button on the home screen and select Music. Go to the library and select the song you want. Play the song. As the song plays, press Menu and select Set As Ringtone.
    For more help with your new HTC Wildfire check out some Android tips and tricks.

    Reference

    HTC Wildfire User Guide - http://www.nex-techwireless.com/applicationdata/1/Documents/HTCWildfire_Manual.pdf
    Image Credit - Images courtesy of /www.nex-techwireless.com.

    9.18.2011

    HTC-LIKE CLOCK / WEATHER CONKY CONFIGURATION


    Conky HTC

    Conky-HTC is a really cool Conky configuration inspired by the HTC weather / clock widget. It displays nice weather icons along with a 7-day weather forecast which can be configured to use either metric or imperial units.

    Setting up Conky-HTC is not hard, but it requires quite a few steps and because some of them weren't specified in the Conky-HTC readme, here is everything you need to do to get it working:


    1. Install Conky:
    sudo apt-get install conky

    2. To be able to use Conky-HTC, you'll also need Conky Forecast which you can download below:

    .deb | .tar.gz

    3. Download Conky-HTC and extract it. In the newly extracted folder, press CTRL + H to be able to see all hidden files and copy all hidden files and folders (.fonts, .images, .conkyForecast.config, .conkyrc, .conky_start and .vreme.template) to your home directory. Make sure you've copied all these files!

    4. Now we need to configure Conky-HTC:

    a) Run the following command in a terminal:
    gedit ~/.conkyForecast.config

    And if you don't want to use "PT-br" as the language, replace it with "en".

    In the same file you can change the date format as well as the unit (metric by default). To change from metric to imperial, at the end of the last line, where it says "unit=m", replace "m" with "i".

    Please note that there's no need to change the XOAP parameters in from this file - just leave them as they are.

    Now you can save the file.


    b) Configuring the weather: visit http://www.weather.com and search for your location ("country, city"). After visiting your location page, your area code should be displayed ad the end of the URL. Here's an example:
    http://www.weather.com/weather/today/Bucharest+Romania+ROXX0003

    Copy the code (ROXX0003 in my example above - but make sure you use your code). Now run the following command in a terminal:
    gedit ~/.conkyrc

    And replace all "BRXX0232" occurrences with your area code (you can select "Replace" in Gedit and replace all with a click) which you've copied in the step above.


    - Conky HTC is a bit too close to the top panel, so to move it a bit, in the same .conkyrc file, replace "gap_y 10" with "gap_y 40".


    - And finally, in the same file there's also a small bug for those who want to use Conky HTC in English: on line 52, there is some code that looks like this: "${time %e} de ${time %B} de ${time %G}" - remove both "de" words to fix it.

    Now you can save the file.


    5. Now you can start Conky by running the following command:
    conky

    6. To add Conky HTC to startup, open "Startup Applications", click "Add", under "Name" enter "Conky HTC" and for the command, select "Browse", hit CTRL + H to see hidden files and select the ".conky_start.sh" file from your home directory.


    Download Conky-HTC

    9.05.2011

    Installation tutorial Android HD Mini (Photon)


    Here is a small guide to install Android on your HD Mini (Photon)!

    1. Download your favorite version of Android for Photon. (You can do it here )

    2. Format the memory card with this tool (You can find it here )
    2.1 The format must be a Full Erase or Full Overwrite
    2.2 Perform additional formatting FAT32 on Windows, Computer> Right Click with the Memory Card> Format.

    3. Copy all the files in the ROOT * of your memory card.

    4.Staccare the device from your PC and go to File Explorer, run HARET.exe

    ** 5.Attendere 5-10 minutes and enjoy your device with the Google operating system at home!

    * For ROOT refers to the root folder of memory card (eg if the memory card is G: \ files go directly on G: \)

    ** The first time you run Haret will take longer time to load, then just one or two minutes to launch.

    SOURCE: XDA ( Link to original thread )

    Related Posts Plugin for WordPress, Blogger...